Board
Show the records of a database as cards in columns, grouped by a field, and move, sort, and update them from their cards.
The Board view shows the records of one database as cards in columns. Each column is one value of the field that the board groups by. For a select field, each column is one option of the field.
Common uses include:
- Project management, from backlog to completion
- Sales pipelines, from lead to closed deal
- Hiring processes, from sourced candidate to hired candidate
To open it, select Board in the view type menu of the database toolbar, or press B.
Set up a database for the board
A board needs a field to group by. If the database has no groupable field, the board shows Set up this database.
- Select a preset under Start with a preset: Basic, CRM, Project Management, Support, or Hiring.
- Change the Field name and the values if necessary. Each value becomes a column.
- Select Create field.
Blue creates a Select (single) field with these values, groups the board by it, and uses it as the record status field of the database.
Use options as process steps
Use a Select (single) field for the steps of your process. In many databases this is the List field. Each option is a column. Give each option the name of its step.
Drag a card to another column to move the record to a different step. Blue changes the field value of the record.
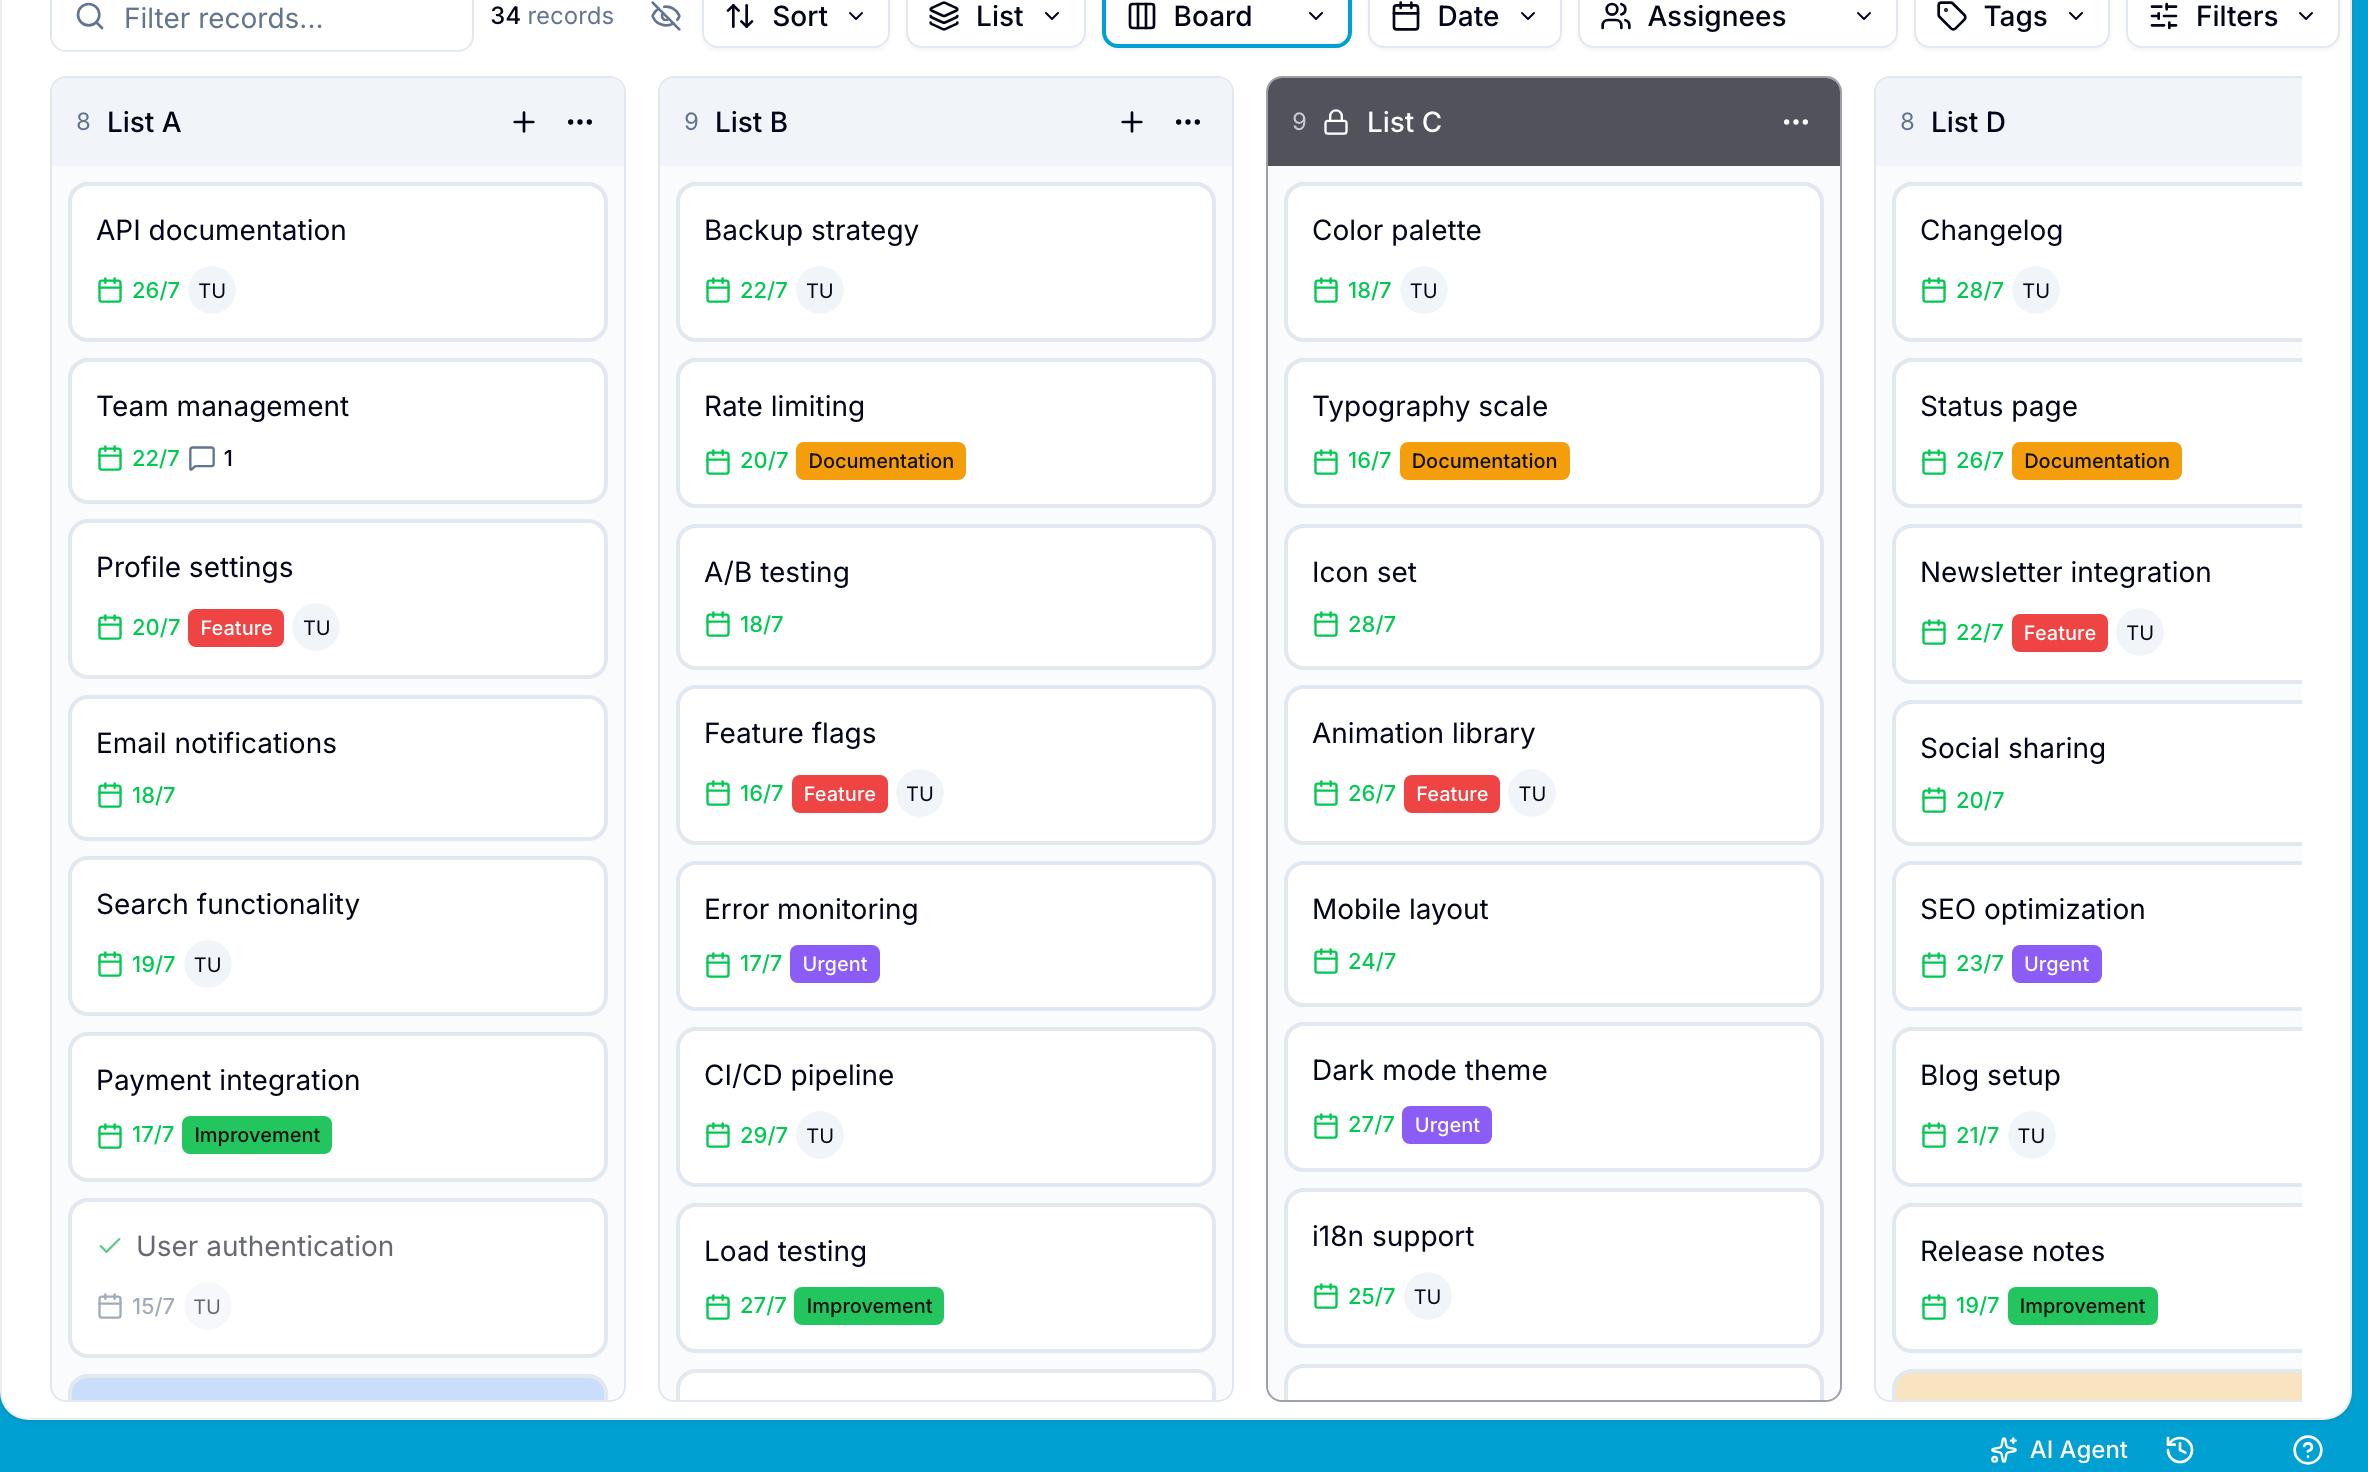
To add a column for a Select field, select Add option after the last column. Only workspace owners and admins can add options.
Group records
Select the group button in the toolbar. The button shows the name of the grouped field. Then select a field. The board groups by fields of these types:
- Select (single) and Select (multi)
- Checkbox
- Country
- Date
- Reference
- Assignee
- Rating
By default, the board groups by the first Select (single) field of the database. If there is none, it uses the first groupable field.
For a Date field, select Actual or Relative date columns. Blue creates one column for each day in the configured range. For a select field, choose whether to show empty columns. You can also select the eye icon in the toolbar to show or hide empty columns.
Update a field by dragging
Dragging a card to another column writes the value of that column to the grouped field. For example, moving a card from High to Low changes its Priority field to Low.
- For a Select (multi), Assignee, Reference, or Country field, Blue removes the value of the old column and adds the value of the new column. Other values stay.
- Dragging a card to the empty column clears the field.
- You cannot drag cards into or out of a locked column.
To change the value without dragging, right-click the card, select Move to option, then select the new value.
Use record cards
A record card shows the name of the record and the fields that you select for the card.
To create one record, select + at the top of a column, or the add button at the bottom of a column. Blue sets the grouped field of the new record to the value of that column.
Drag a card within its column to change its position.
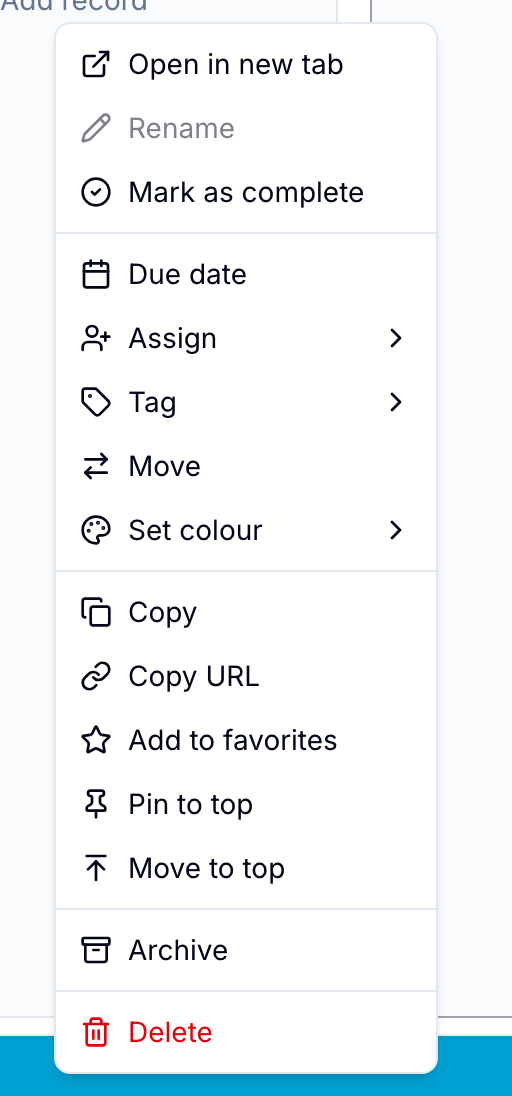
Right-click a card to open these record actions:
- Open in new tab: Open the full record in a new browser tab.
- Rename: Change the record name.
- Mark as complete: Mark the record as complete or incomplete. This shows only when the database has a completion field.
- Move to option: Change the value of the grouped select field.
- Copy: Duplicate the record in the same database.
- Copy URL: Copy a link to the record.
- Pin to top: Keep the record above unpinned cards in its column.
- Move to top: Move the record to the top of its column.
- Archive: Archive the record.
- Delete: Delete the record.
If you select multiple cards, the menu provides the applicable bulk actions. It also sets field values across the selection. Toggle a Checkbox field, select an option in a Select field, click a Button field, or select Set “<field>” all to enter one value for the other field types. Only fields with Show in bulk actions turned on appear, and bulk field edits require the Pro plan.
Change a column
Select the column menu (…) in a column header. The options depend on the grouped field and your role:
- Rename: Rename the option. Workspace owners and admins only, for Select fields.
- Lock or Unlock: Stop or allow moves into and out of the column. Workspace owners and admins only, for Select fields.
- Set WIP limit or Edit WIP limit: Set a work-in-progress limit for the option. Workspace owners and admins only, for Select (single) fields.
- Color: Change the column color. Workspace owners and admins only.
- Archive all: Archive every record in the column.
- Move to option: Move every record in the column to another column.
- Sort: Sort only this column. Read Sort cards.
- Custom Fields: Set a field value for every record in the column. This requires the Pro plan.
- Copy Field ID: Copy the ID of the grouped field.
- Add option left or Add option right: Add an option next to this column. Workspace owners and admins only, for Select fields.
Select and drag multiple cards
Hold ⌘ on Mac or Ctrl on Windows and Linux, then select cards to select them individually. Hold ⇧ to select a range.
Drag any selected card to move all selected cards to another column or position. Right-click the selection to apply the available bulk actions.
A command bar also appears at the bottom of the board while cards are selected. It shows how many cards are selected and provides Due date, Assign, Tags, and More. Select the close icon in the command bar to clear the selection.
Sort cards
Select Sort, then select one or more fields of the database and their directions.
Blue applies the sort within each column.
To sort one column differently, open the column menu and select Sort, then select a field and a direction. A column sort uses one field and replaces the board sort for that column only. Select Manual (drag order) to remove the override and follow the board sort again.
Saved views keep column sorts.
Pin cards
Right-click a card and select Pin to top. The card stays above unpinned cards in its column.
- To pin or unpin multiple cards, select them before you open the context menu.
- To unpin one card, select its pin badge or select Unpin from its context menu.
Configure card content
Configure the cards of each database in Settings > Databases > Card Interface:
- Card Size: Use account default, Compact, or Normal.
- Card Fields: Select the fields that show on the front of each card from Available Fields.
- Image Cover Options: Choose the source and select First Image, Last Image, or Multiple. Multiple images form a grid of up to 25 images. See Cover images.
The Preview shows an example card with your settings.
Filter cards
Use filters to show only the records that match your criteria. Filters change the visible cards, not the columns.
Read Filters for all filter options.